How to Lube Stabilizers
A subtitle showing that we know our stuff
So, my young Padawan, if you've already dive into the differences between stabilizers and reached the "I want to lubricate everything myself" stage, then this guide is for you. It doesn't claim to be the only or unique guide, but it stands as a classic in its purest form.
This guide is relevant for any kind of stabilizers. However, if your out-of-the-box stabs rattle so much that typing a space makes the windows shake, and you're too impatient to wait for new ones — check out the guide on anti-rattling mods.
If you're more of a visual learner, there's a great video by Taeha that we recommend as a must-watch:
Tips before you start:
- Make your favorite drink. Coffee, for instance
- Think back on a pleasant childhood memory
- Don't slather on the lube thickly at first; get a feel for it. It's better to under-lube and then add more, rather than overdo it and struggle to clean off the excess
- Remove excess lube from those parts of the stabilizer that come into contact with the keyboard and keycaps
Instruction:
Start with the routine: disassemble the keyboard and get to the stabilizers. If the stabilizers are PCB mount, you'll have to desolder the whole keyboard to get to them. If you have plate-mount stabilizers, consider yourself lucky and feel free to put on a sly smile - you only need to desolder the switches between the stabs.
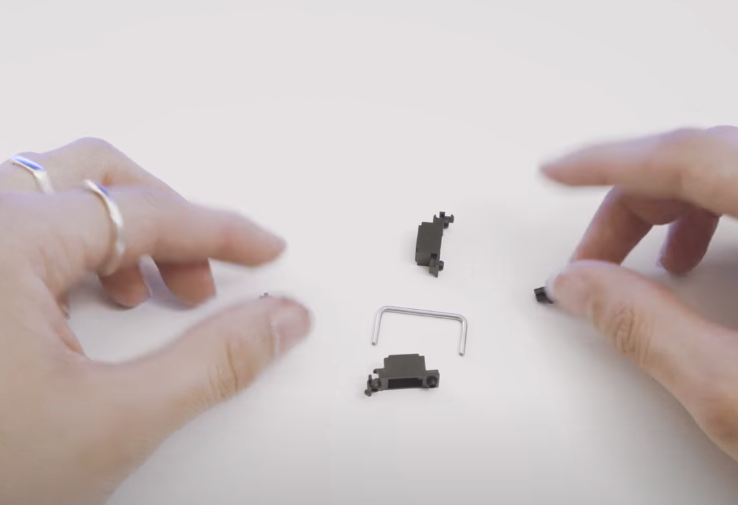
1. Use a spudger to remove the stabilizer, disassemble it into its components: a housing, a stem, and a wire.
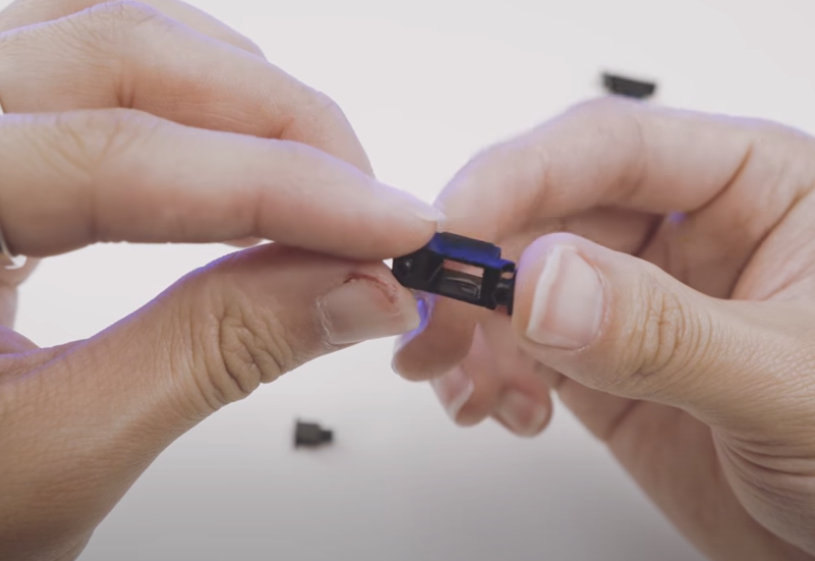
2. Lube the housing with Krytox, including the internal walls of the housing. Apply a thin layer, there's no need to overdo it here.
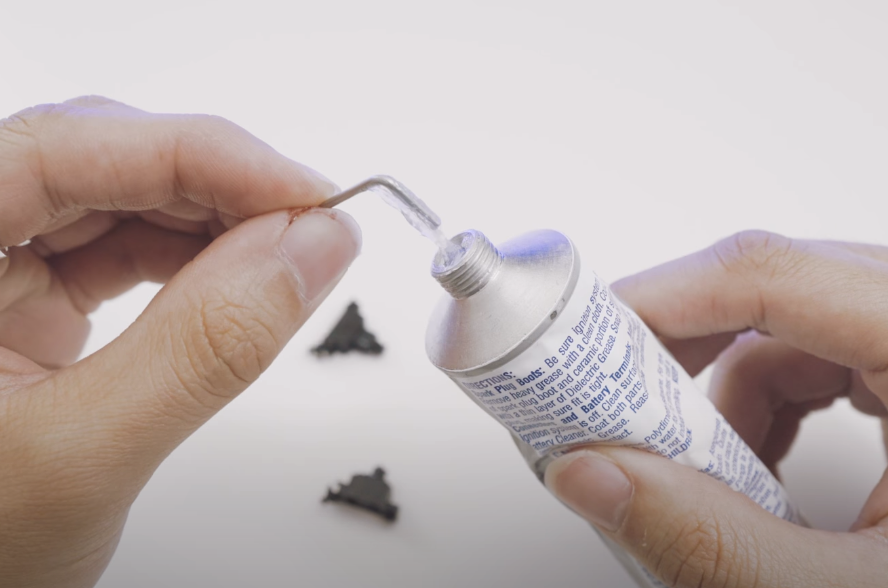
3. Evenly cover the wire with Permatex, or according to Taeha's new guide, with Krytox.
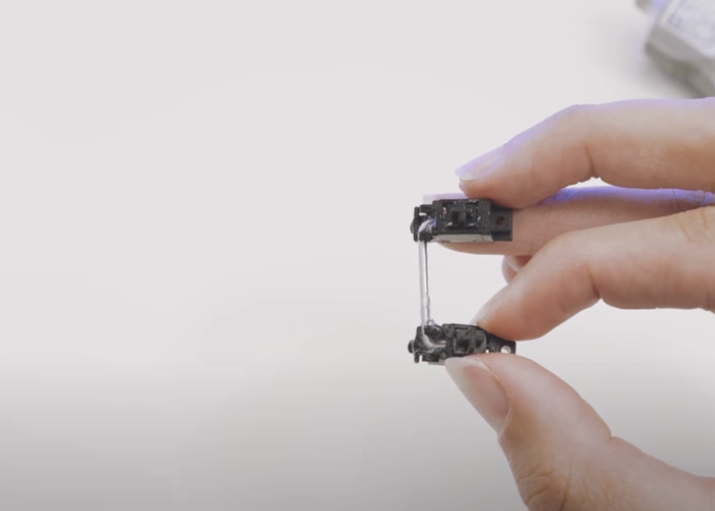
4. Next, assemble the construction and remove excess lubricant as it can affect the final typing feel.
5. The last step is to install the stabilizers back into the keyboard.
Tool Kit:
- Screwdriver — you will need to disassemble the keyboard before starting the work
- Keycap Puller — for convenient removal of keycaps
- Switch Stem Holder — allows for easy handling of small parts (not essential for stabilizer lubrication)
- Switch Opener — useful for disassembling and lubricating the switch under the stabilizer
- Disassembly tool kit — for easy extraction of stabilizers
- Soldering iron — for desoldering switches
- Solder sucker — necessary for desoldering with a soldering iron
- Solder — without it, soldering can only be done by mastering magic
- Switch puller — for convenient removal of switches
- Permatex & Krytox 205G2 lubes — the most popular stabilizer lubricants
- Brush — for applying the lubricant
If you prefer to arm yourself and do everything on your own, here is a link to our STABILIZER LUBRICATION service, with blackjack and... well, you get the idea.